How to…
How to...
How to add and manage moods
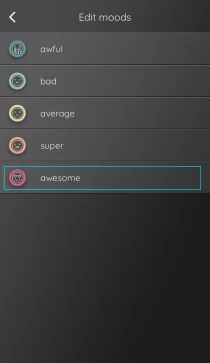
The application has 5 sample moods built in, making it easy and quick to operate them on the slider. You can personalize them freely to make it even easier for you to create daily entries. Moods can only be managed from the profile. To do this, go to:
- Profile -> Edit moods
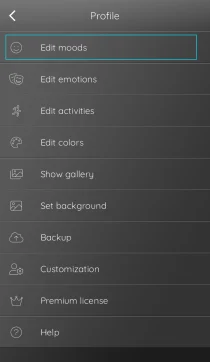
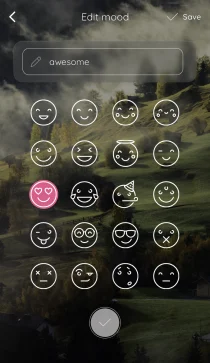
From here, by clicking on each mood in turn, you can change the icon and name of each mood.
How to add and manage emotions
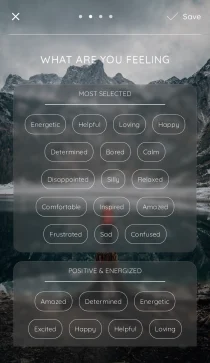
Emotions allow us to specify exactly what we are feeling at a given moment. This is a step in the entry that is not required (you can skip it by going further), but completing it will certainly allow us to further specify our mood every day. Statistics like it
Emotions are divided into 4 categories that will allow you to easily find a given emotion; you can also use most popular, where you will find the emotions you choose most often.
You can add and manage emotions from two levels:
- while adding an entry, click on edit emotions which is located at the very bottom of the page
- go to profile -> edit emotions
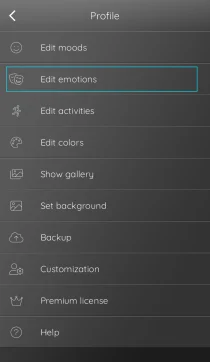
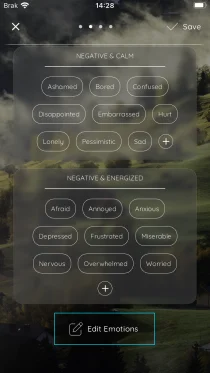
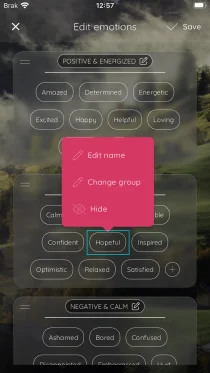
To change or delete an existing emotion, short press on the selected emotion or category – then a dialog box will appear where you can decide what you want to do – rename, change the group or hide (so that it does not show when adding entries). If you want to change the position of an emotion or an entry – hold the selected item longer and then drag it to the desired place.
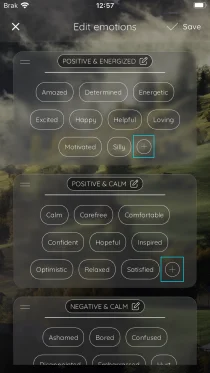
To add a new emotion, first select the category to which you want to assign it, and then click the “+” button at the very bottom. In the dialog box that appears, enter a name and then click “OK”.
How to add and manage activities and their categories
Activities show us what we were doing at the moment. This is a step in the entry that is not required (you can skip it by continuing), but completing it will allow us to show how our daily activities affect our mood.
Activities are grouped into categories to easily organize your daily activities; you can also use ‘most selected’, where you will find your most popular activities so far.
You can add and manage activities and their categories from two levels:
- when adding an entry, click on edit activity at the bottom of the screen where you select activities
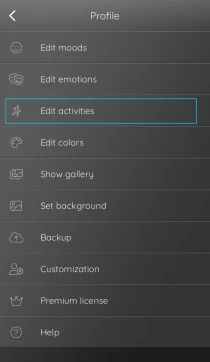
- go to Profile -> Edit activities
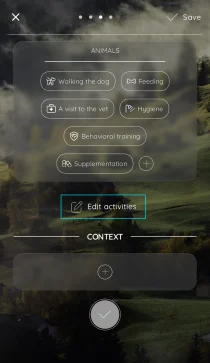
How to manage activity categories? Add, rename or delete a category?
We manage activity categories from the level of adding an entry (click on “Edit activities” at the very bottom of the screen when we are on the activity marking page) or go to the Profile -> Edit activities. Then we can manage the activity categories:
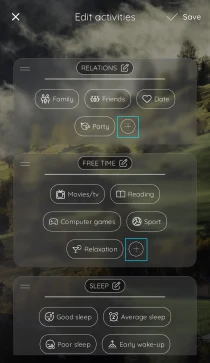
- To add a category, click on the “+” button at the bottom of the activity editing page
- To change the name of a category, short click on the name of the category – a dialog box will appear, thanks to which you can change the name of the category or hide it (it will not be visible when selecting activities)
- To move a category, long-click on a category tile and then move it to a place of your choice.
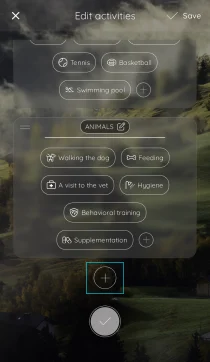
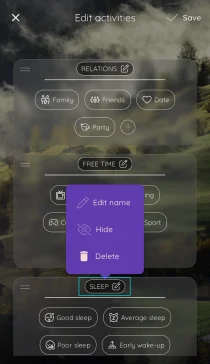
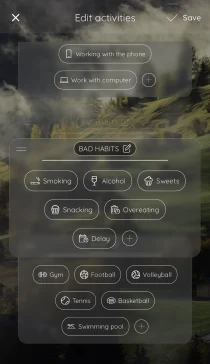
How to manage activities? Add, rename or delete an activity?
We manage activities as mentioned above, from the level of adding an entry (click on “Edit activities” at the very bottom of the screen when we are on the activity marking page) or go to Profile -> Edit activities. Then we can manage the activities:
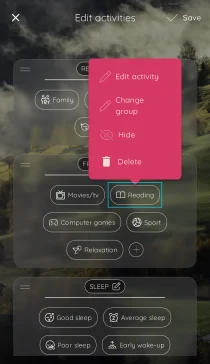
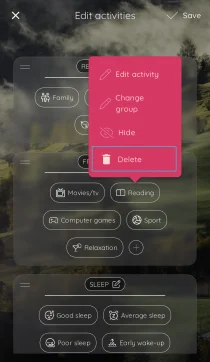
- To change or delete existing activities, select the category they’re in, then select the activity you want to manage. After clicking on the activity, a dialog box will appear that allows you to: rename, change the icon, hide or delete the activity
- To add a new activity, first select the category to which you want to assign it, and then click the “+” button at the very bottom
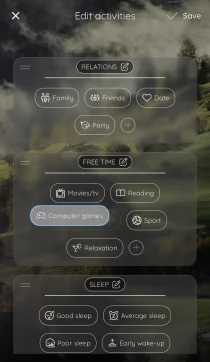
- To move an activity, long-click on the activity’s tile, then move it to a location of your choice. You can move an activity this way only within its category. To change its category, click on the tile of a given activity, in the dialog box that will appear, click “change group”
What is the difference between hiding an activity and deleting it
On the Edit activities page, in addition to adding new items, there are also options to hide and delete them. What’s the difference between these options?
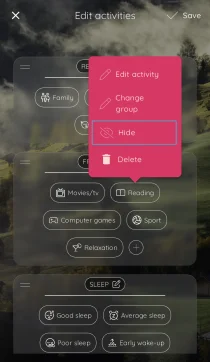
Hide your activity:
This is a useful function when you do not want to use some activity temporarily, because it does not occur in your everyday life (e.g. you decided to take a break from the swimming pool and you know that you will not go to it for now). This is then the perfect feature – the activity will be hidden and will not be visible when making entries,. At the same time, this activity will not be removed from the entries made so far, and will additionally be included in the statistics. You can deactivate hiding at any time.
Delete an activity:
It is a function that is permanent and irreversible. If you delete an activity that was previously used in posts, it will disappear from all posts and thus will no longer be included in the statistics. Use this feature when you know that a given activity is not used by you and you certainly will not use it again.
If you accidentally deleted an activity, use the backup option as soon as possible.
How to add and manage contexts
Context is an activity or event in our lives that has a much wider time span than ordinary activities. These are events that, due to their importance or duration of impact, can significantly affect our mood and perception of everyday activities. That is why it is worth monitoring them and observing what influence they have on us.
How to add the created context to a calendar or entry?
You can add context from two levels:
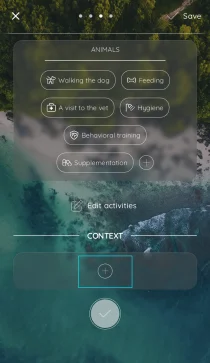
- when adding an entry, go to the step in which activities are selected, and then scroll down to the very bottom of the page. There you will find a place for context – to add a new one, click on the “+” in this area
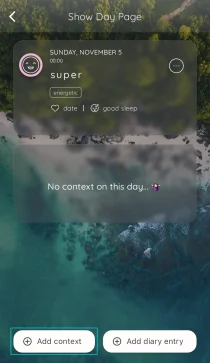
- go to the calendar -> then click on the day you would like to add context -> at the very bottom of the page click on the “add context” button
How to manage contexts?
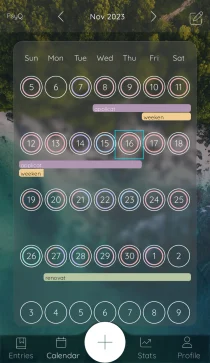
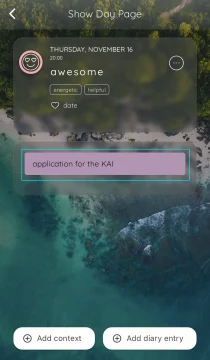
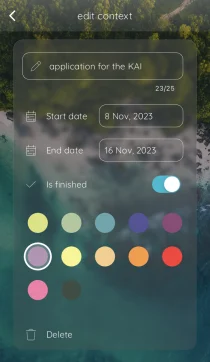
Contexts are most easily managed from the calendar entry. We can see here how they are distributed over time, we can also click on any day when the context occurs, and then, after opening the show day page, click on the selected context to edit it.
From this position, we can edit the type of context, modify its date as well as the color that is displayed in the calendar and entries.
How to change theme color
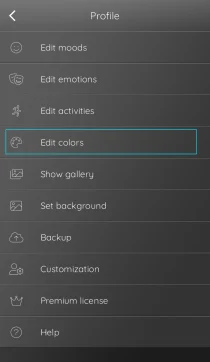
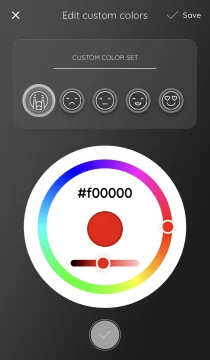
Personalize your entries by choosing your favorite colors to suit your mood. You can use the colors we have prepared for you, or choose your own. To change the color go to:
- Profile-> Edit colors
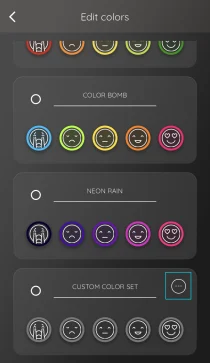
You can choose the topics we have prepared for you here. If you want to create your own colors, scroll down to the very bottom. The last tile is for you – you will create your own palette here. Click on ⚇ then click on the emoticons and on the color wheel set the colors you want (on the wheel you choose the color, using the horizontal color intensity slider).
How to change the background
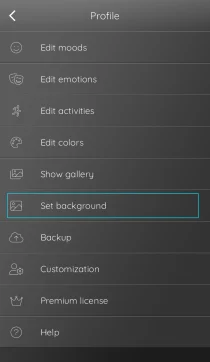
Personalize the appearance of your app by choosing your own background for it. You can use the suggestions we have prepared for you, or choose your own background from the phone’s resources. To change the background go to:
- Profile -> Edit backgrounds
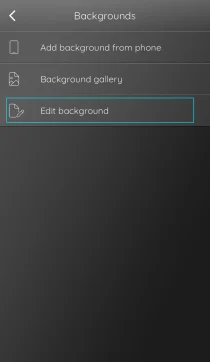
- then select your own background by clicking on -> Add background from phone
- or choose from the backgrounds we have prepared for you -> Background gallery
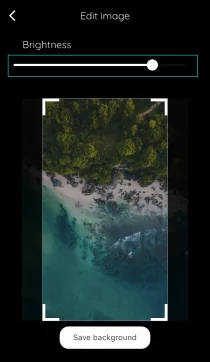
You can additionally edit the background you choose in the Edit background tab, where you can set the brightness of the background and crop it.
How to add an entry
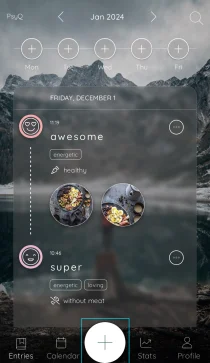
Entries can be added from multiple levels. The Floating Action Button located in the central part of the footer is used for this. Thanks to it, we can quickly go to adding an entry on the current day:
By default, the current day is added, you can change it in the first step in the entry – changing the date and time:
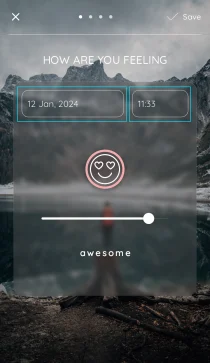
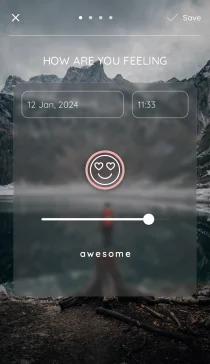
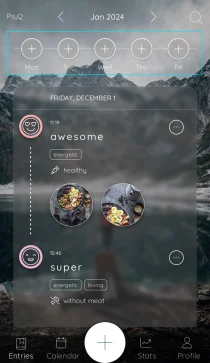
The entry consists of 4 steps – pages with choosing: a mood, emotions, activities and page with notes / pictures. You only need to complete the first one, the rest is not required and you can skip it by going on, although remember that the more complete your entries are, the easier it will be to include in the statistics what exactly shapes your mood and what influences it. All of these selections will be displayed on the main page of entries.
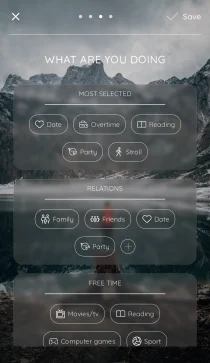
Also, when you scroll down to the bottom of the activity, you’ll see a tile for adding contexts. If you want to quickly add context to the post, use this option. Editing and adding contexts is described in more detail here.
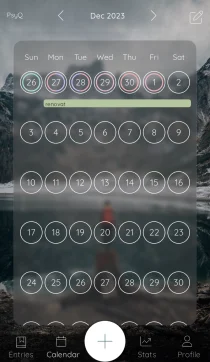
If you are missing entries and have no continuity, the calendar is worth visiting. You can easily catch the missing days there. You can also complete them from this level. Just click on the selected day, and then select the “Add entry” option at the bottom. In addition, in the view of entries, at the very top, you can see whether you have completed the last 5 days. Here, too, after clicking, you can quickly go to the completion of the selected day.
How to edit or delete an entry
Each added entry can be edited or deleted later. Just click on the navigation icon next to the entry you want to change.
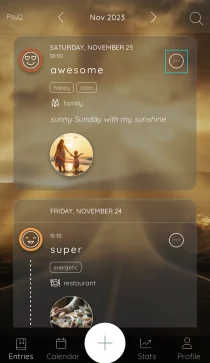
The lower menu will expand, thanks to which you can easily go straight to the point of the entry you want to edit (mood, emotions or activities) or delete it completely.
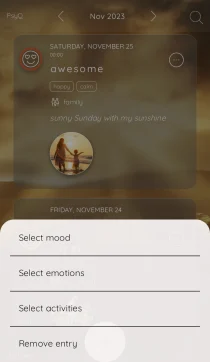
If you accidentally deleted an entry, use the backup option.
How to add a note or photo to your entry
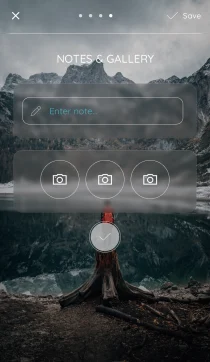
The application allows you to add photos and notes to entries. Remember that they are not included in the statistics, but they will certainly enrich your daily entries and allow you to personalize them even more. If you want to add a photo or note, you have to go to the last step when adding an entry – “Notes and gallery”.
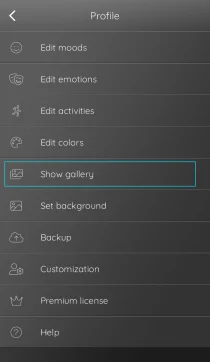
The application allows you to add only three photos per entry. You can organize your photos here:
- Profile -> Show gallery
How easy is it to catch missing entries and complete the calendar with entries?
If you care about adding entries regularly (and it’s worth it 👍) and would like to see where they are missing and then complete them, go to the calendar.
Each month has days surrounded by a white border. If there is an entry on a given day, the date has an additional border in the color of the mood in which the entry is made. If there are several entries on a certain day, the border will have appropriately divided colors for each mood, taking into account their percentage.
When you see that a date has no entry, so there is only one white border – click on this date. A screen showing the details of the day will be displayed. At the very bottom you will find the “Add diary entry” function
The lower menu will expand, thanks to which you can easily go straight to the point of the entry you want to edit (moods, emotions or activities) or delete it completely.
If you accidentally deleted an entry, use the backup option.
How to manage most popular
You will find the most popular by making an entry in the step where you add emotions and activities. This is a non-editable tab, it is created on the basis of the choices you make most often. In this way, you have your most common choices gathered in one place – it makes it much easier to make daily entries.
How to create backups
The PsyQ app helps you to keep your data safe by allowing you to create backups of your logs. You can choose from two backup options:
Local backups: You can create local backups on your device using the PsyQ app. This means that you can export your log data to a file and save it on your phone or another device. To do this, go to the app settings and look for the “Export” or “Backup” option. You can then store the backup file in a secure location, such as your device memory or the cloud.
Cloud backups: You can also create cloud backups using services like Google Drive or iCloud. The “Premium” version of the app lets you set up automatic cloud backups. This way, your data is regularly synced with the cloud service of your choice, which offers extra security and easy access to a backup copy in case you lose or damage your device.
Backups are essential to protect your data and prevent it from being lost. No matter which backup option you prefer, it is important to make backups frequently so that you have the most recent data saved in a safe place. This will ensure that your information is preserved and available if you ever need to restore a backup.
